Top Ad 728x90

Showing posts with label Home & Garden. Show all posts

Thursday, October 22, 2026

Small shampoo bottles in hotels carry risks that few travelers are aware of.

Small shampoo bottles in hotels carry risks that few travelers are aware of.

by
Small shampoo bottles in hotels carry risks that few travelers are aware of.

Small bottles of shampoo, conditioner, and shower gel are a common sight in hotels. Many guests use them without a second thought, even packing them into their suitcases before leaving.

However, behind these products lies a little-known reality: while most are safe, there have been reports of bacterial contamination, lack of required approvals, and hygiene issues with reusable dispensers.

This doesn’t mean that all hotel cosmetics are unsafe, but it’s worth checking them before using them.

A case that caused concern

One of the most serious incidents occurred in the&

nbsp;

United States. Gilchrist & Soames, a supplier of hygiene products to numerous hotels, was forced to recall millions of units of shampoo, conditioner, body lotion, and shower gel.

An inspection by the US Food and Drug Administration (FDA) revealed significant microbiological contamination of some products.

Among the detected microorganisms was the bacterium *Pseudomonas aeruginosa* (Pseudomonas aeruginosa), which can cause infections, especially in people with a weakened immune system, open wounds

or co-occurring diseases.

The FDA also found deficiencies in manufacturing processes, cleaning procedures, raw material control, and contamination prevention.

The

company subsequently implemented corrective actions, and in 2018, the agency announced the completion of its review of these actions.

Official source: https://www.fda.gov/inspections-compliance-enforcement-and-criminal-investigations/warning-letters/gilchrist-soames-485833-02202018

This case shows that even products manufactured for well-known hotels can raise concerns if sanitary control procedures fail.

Products without the required permits were also detected.

The problem is not limited to one company.

Philippine health authorities issued a warning about a product called “Grand Regal Hotel Conditioning Shampoo” because it lacked the necessary approvals. Because the product had not

been registered,

During a subsequent inspection of tourist facilities in the country, authorities noted that more than half of the toiletries suppliers inspected were not properly registered.

This does not mean that all their products were contaminated, but it does indicate thatthey may have been produced or placed on the market without the required quality control.

Risks associated with refillable dispensers

To reduce plastic consumption, many hotels have replaced small, individual bottles with large dispensers

installed in the shower.

While this solution can be environmentally beneficial, the type

of system used is crucial.

Dispensers that use sealed, replaceable cartridges offer greater safety. However, dispensers that open to pour shampoo from a large container can become contaminated if not properly cleaned and disinfected before refilling.

Scientific studies of refillable dispensers have shown that bacteria can grow and form biofilms inside these systems. Previous studies cited by the researchers found contaminants in approximately one in four dispensers tested.

Topping up occurs when new product is added without first emptying, washing, disinfecting, and drying the container.Bacteria present in product residues

may adhere to the inner walls and contaminate the newly poured contents.

There’s also a risk of tampering with the dispenser by guests if it’s easy to open. Stories circulate online about people allegedly pouring depilatory cream or other substances into these containers.

While there is no evidence that this is common practice, an open or unsecured dispenser is an avoidable risk.

How can you tell

if hotel shampoo may be dangerous?

Before use, it is worth paying attention to a few details.

Do not use the product if

the bottle:

It has a broken seal or appears to have been previously opened.

Shows signs of leakage around the cap. Contains fluid that has separated, is lumpy, or has an unusual color.

It emits an unusual smell.

It is completely devoid of any label or markings.

Looks like it has been refilled or used.

It has expired or comes from an unknown source.

In the case

of large dispensers, it is worth making sure that they are securely fastened and closed and that they are notshow signs of

tampering. If the lid can be easily lifted or the contents look unusual, it is best not to use it.

SIGNS THAT YOUR HEART IS NOT RIGHT, PAY ATTENTION

SIGNS THAT YOUR HEART IS NOT RIGHT, PAY ATTENTION

by
SIGNS THAT YOUR HEART IS NOT RIGHT, PAY ATTENTION

Discover more Find Recipes Read Med Journals cold 3. Extreme and Unexplained Fatigue Do you feel exhausted after performing tasks you used to do with ease? Cardiac fatigue is different from regular tiredness. It’s that feeling that your energy has vanished for no apparent reason. This fatigue is characterized by:

Anatomy Sudden appearance It does not improve with rest It interferes with daily activities. Our cardiology specialists at the Clinical Center 2000 have observed that this sign is especially common in women, although it can affect anyone.

Frequent Dizziness and

Fainting Have you experienced sudden dizziness or a feeling of faintness? When the heart can’t pump blood efficiently, the brain may not receive enough oxygen. Cardiac dizziness often: FindTreatments

Appear during exercise Worsens when changing position Accompanied by cold sweats It’s important to distinguish these dizzy spells from others caused by inner ear problems or low blood pressure. Therefore, a professional medical evaluation is essential.

Swelling in legs, ankles or feet Have you noticed your shoes feeling tighter at the end of the day? Fluid retention can be a sign

that your heart isn’t working properly. This cardiac swelling has specific characteristics:

It gets worse towards the end of the day It leaves a mark when pressed with a finger. It can extend down to the calves At our medical center in Getafe, we perform comprehensive evaluations to determine if this swelling has a cardiac origin or is due to other causes. FindTreatments

Discover more Colds Get Cold Relief Monitor Vitals

Palpitations or Irregular Heartbeat Do you feel like your heart is skipping beats or beating too fast? Occasional palpitations

are normal, especially after exercise or coffee. However, when they become frequent, they deserve attention. Worrying palpitations include:

Anatomy Very rapid heartbeat at rest Sensation that the heart “stops” Accompanied by chest pain Our team of cardiologists uses advanced technology to evaluate heart rhythm and determine if there are any irregularities that require treatment.

Pain that spreads to the arms, neck, or jaw Did you know that heart pain doesn’t always stay in the chest? It often radiates to other parts of the body, especially the left arm, although it

can also affect the right. This radiating pain can manifest as:

Left arm (more common) Neck and jaw Back, between the shoulder blades Stomach area Many people don’t associate these pains with heart problems. That’s why it’s crucial to pay attention to these symptoms, especially if they appear during physical exertion.

Cold and Excessive Sweating Have you experienced excessive sweating without exercising or feeling hot? Cold sweats can be a significant warning sign, especially if accompanied by other symptoms. This cardiac sweating is characterized by:

Appear suddenly To be cold

and clingy Not related to ambient temperature At the Clinical Center 2000, we have seen how this symptom, although less well known, can beDiscover more Study Anatomy Get Health Tips Find ENT Doctors 9. Unexplained Nausea or Vomiting Who would think that stomach problems could be related to the heart? However, nausea and vomiting can be cardiac symptoms, especially in women. These digestive and cardiac symptoms often include: StudyAnatomy

Anatomy Appearing along with other symptoms Not improving with stomach medications Worsen during exertion It is important not to dismiss these

symptoms as simple digestive problems, especially if they occur repeatedly.

Persistent Cough with Pink Phlegm Can a persistent cough be a heart symptom? Indeed, when the heart isn’t pumping efficiently, fluid can build up in the lungs, causing a characteristic cough. This cardiac cough presents with:

Persistence despite treatment Frothy or pink phlegm Worsening when lying down Our patients often tell us, “I thought it was just a bad flu.” That’s why it’s important to consider all possibilitieS“Don’t delay and schedule an appointment soon if you have: Several mild

but persistent symptoms; Unexplained fatigue that doesn’t improve; Progressive swelling in your legs; Any concerns about your

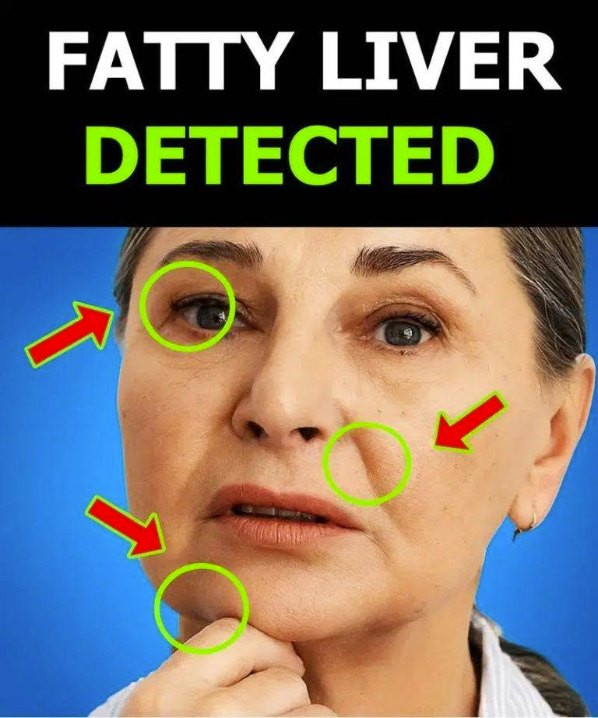
Everyone with fatty liver has this in common! A hidden sign you should know about.

Everyone with fatty liver has this in common! A hidden sign you should know about.

by
Everyone with fatty liver has this in common! A hidden sign you should know about.

When we talk about liver health, most people think liver problems are obvious, painful, or easy to detect. But the reality is quite different: fatty liver is silent, develops slowly, and can progress for years without causing any noticeable symptoms. However, there is a very common habit that almost everyone with fatty liver shares, even without knowing it: living with a metabolic imbalance that begins long before the liver “screams.”

Disco Insert image

Normal

Code

ver more

Cleansing & Detoxification

GERD & Digestive Disorders

Obesity

Blood Sugar & Diabetes

Even if you don’t

notice it, your body is sending signals. If you feel heavy after eating, have trouble losing belly fat, have high triglycerides, or are told that “everything is normal,” but you don’t feel well… you could be facing a liver problem that went undetected.

The core of the problem: an overloaded metabolism Most people who develop fatty liver share the same silent triad:

Discover more Biological Sciences health Biological Sciences Health

Insulin resistance

The body produces too much insulin to handle the excess sugar and energy.

This causesthe liver to work overtime, store more fat, and become overloaded.

Visceral

Mom Warns Others About The Link Between A ‘Fishy Smell’ And Melting Electrical Outlets.  Check the first comment.

Mom Warns Others About The Link Between A ‘Fishy Smell’ And Melting Electrical Outlets. Check the first comment.

by
Mom Warns Others About The Link Between A ‘Fishy Smell’ And Melting Electrical Outlets.  Check the first comment.

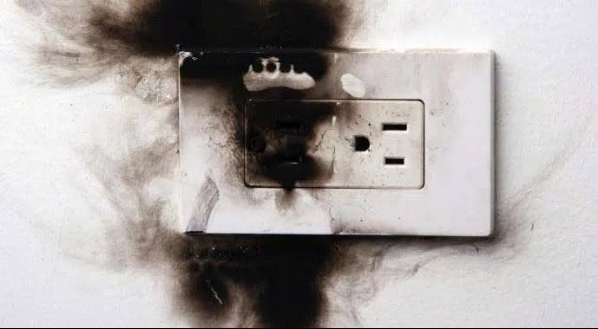
I would hope that we all know carbon monoxide is odorless, and that’s why everyone should have multiple carbon monoxide detectors in their home. Most people are also aware that a smell similar to rotten eggs signals a natural gas leak. But if you happened to smell something fishy in your home, what would your first reaction be? And by any chance, do electrical fires smell like fish?

Katie Rose Dugger took to Facebook to warn others about a fishy smell in her home that ended up being something pretty&

nbsp;

terrifying. Katie explained that a few weeks ago, her son’s bedroom started to smell like fish. She searched and deep cleaned his room, yet could still not figure out what the source of that awful smell was. Do electrical fires smell like fish? Finally, Katie decided to do a quick Google search in order to determine where the odor was coming from.

Her search revealed that a fishy odor can point to melting plastic from electrical outlets. Sure enough, she discovered an outlet that was overheating and melting the

plugs.

After calling an electrician that same day, the electrician found that there was a bad, loose wire in the outlet. He ended up having to replace the whole outlet. Do electrical fires smell like fish, you ask? Her experience answers that.

Let Katie’s warning serve as important information regarding the outlets in your home. If you smell something fishy and can’t figure out the source, it’s time to check the outlets and plugs for overheating. Do electrical fires smell like fish? Knowing this information could prevent a tragic

fire and

potentially even save lives.

If you have a heart attack at home, do this in 10 seconds and you can save your life.(1 / 2)

If you have a heart attack at home, do this in 10 seconds and you can save your life.(1 / 2)

by
If you have a heart attack at home, do this in 10 seconds and you can save your life.(1 / 2)

Silence at home, sometimes, isn’t just a lack of noise. It’s an invisible wall that rises when the body sends out alarm signals that can’t be ignored. It’s the moment when everyday life falls apart, giving way to a sense of oppression that suddenly tightens the chest like a vice, leaving no escape. You feel a growing pressure, an discomfort that seems to rise from tired muscles to become a vital emergency.

It’s the clear and terrifying realization of being completely alone in an environment that until a few

moments

ago seemed reassuring. The room begins to feel too small. There’s no one to ask for help, no hand to hold for comfort in this critical moment. Breathing becomes shallow, labored, as the heart struggles to maintain a rhythm that is no longer its own.

Every passing second brings with it a question that weighs more than a boulder. What is left to do when the world around you shrinks to a few square meters? Instinct tells you to move, to look for a way out, but the

mind races

frantically for an immediate solution. It’s the search for a last-ditch effort, a desperate attempt to force the body to react before time runs out.

An action that may seem absurd, almost out of place in such a dramatic context, but it is passed down as a potential lifesaver. A maneuver that promises to gain that extra breath, that life-saving heartbeat needed to keep circulation going. But is this desperate attempt truly effective? The answer is a race against time.

It’s a search for a precarious balance

between paralyzing panic

and the clarity that must guide every move. The line between the normality of an ordinary day and the abyss is thin, almost imperceptible. And right now, in this exact moment, we must decide how to act to reverse the final twist. All the details are on the of our article.

When you suspect a heart attack, the first thing to do is call for help immediately. However, if a person is alone and suddenly experiences symptoms, it can be helpful to know some

steps that could help

in the very first moments.

An often-cited technique involves coughing forcefully and repeatedly, alternating each cough with a deep breath. The idea behind this is that coughing temporarily compresses the chest, which can help maintain blood circulation for a few moments.

This chest movement can help stimulate the heart and promote blood flow while you try to reach the phone or call emergency services. During a heart attack, the heart can struggle to pump blood effectively. Every second counts. Coughing forcefully, accompanied by deep breaths,

may temporarily help maintain circulation.

Of course, this is no substitute for medical treatment, but it can be an attempt to buy time until help arrives.

It’s essential to know how to read the signals your body sends before the situation escalates. A feeling of tightness in the chest, or intense pain radiating to the back, arm, or jaw, are indicators that should never be ignored. Often associated with cold sweats, dizziness, or nausea, these symptoms require immediate action.

Cardiovascular prevention is confirmed by the scientific community as the

most effective defense against such events.

Constantly monitoring vital signs such as blood pressure and cholesterol levels is the first step to protecting heart health. A balanced diet, combined with regular physical activity and the avoidance of harmful habits such as smoking, drastically reduces the risk of finding yourself in such a serious situation.

In conclusion, while knowledge of first aid techniques can offer temporary support, the real key remains the speed with which you alert 911 or local emergency services. Not relying solely on self-help methods, but seeking

professional support promptly, is the only actionthat can truly make the difference between a serious complication and the possibility of saving your life.

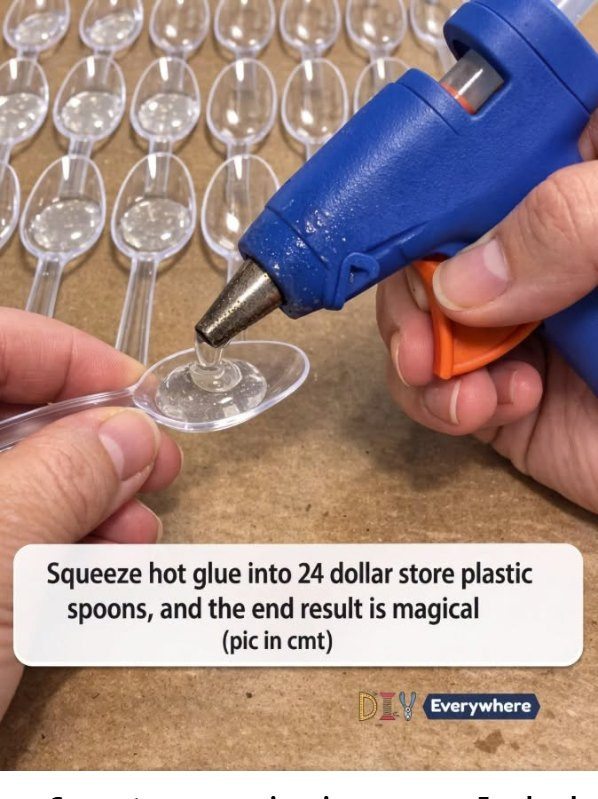
Squeeze Hot Glue Into 24 Dollar Store Plastic Spoons, and the End Result Is Magical!

Squeeze Hot Glue Into 24 Dollar Store Plastic Spoons, and the End Result Is Magical!

by
Squeeze Hot Glue Into 24 Dollar Store Plastic Spoons, and the End Result Is Magical!

What if I told you that a handful of inexpensive plastic spoons could become one of the prettiest decorations on your Christmas tree? It sounds a little unusual, I know! But with sparkling red glitter, a few gold beads, and a little creativity, ordinary plastic spoons can be transformed into beautiful poinsettia-inspired ornaments that look surprisingly elegant.

This DIY red glitter poinsettia ornament is proof that holiday decorating doesn’t have to be expensive to look beautiful.

Imagine layered red petals catching the twinkle of Christmas lights, a shimmering gold&

nbsp;

center, and a delicate ribbon that lets your handmade flower hang proudly on the tree. You could also use these sparkling creations to decorate a wreath, dress up a wrapped present, or add a festive touch to a holiday centerpiece.

And the best part? You don’t need to be an experienced crafter to make something lovely!

If you enjoy finding clever ways to decorate on a budget, this project is a wonderful excuse to gather your supplies, put on some Christmas music, and spend a cozy afternoon making something

special.

Let’s turn those simple dollar-store spoons into a little holiday magic!

What Are DIY Plastic Spoon Poinsettia Ornaments?

Poinsettias are closely associated with Christmas because of their colorful, star-shaped bracts, which are often mistaken for flower petals. Their rich red and green appearance has made them a favorite in holiday decorating for generations.

This craft takes inspiration from that familiar shape and recreates it using the rounded bowls of clear plastic spoons.

The spoon bowls become individual petals. Once arranged in overlapping layers, they form a full flower shape.

Red

glitter adds sparkle, while gold beads clustered in the middle create a decorative center.

A ribbon loop completes the ornament, making it easy to hang wherever you want a little extra holiday cheer.

Although these handmade flowers aren’t real poinsettias, they capture the festive colors and layered appearance that make the traditional Christmas flower so recognizable.

You can keep yours classic with red and gold, or experiment with white, silver, emerald green, champagne, or even icy blue.

One simple idea, so many possibilities!

Why You’ll Love This Christmas

Craft

There

are plenty of reasons to give these DIY poinsettia ornaments a try.

They’re Budget-Friendly

Plastic spoons, glitter, beads, and ribbon are usually inexpensive supplies. If you already have a glue gun and some craft materials at home, you may only need to purchase a few extras.

You can create several decorations without investing in costly specialty ornaments.

They Look Beautiful on a Christmas Tree

The layered petals give the ornament depth, while the glitter reflects the light from nearby Christmas lights.

Red and gold make a particularly

festive combination, especially

when paired with traditional green branches, gold ribbon, and warm white lights.

They’re Easy to Customize

Prefer a snowy winter theme? Use white glitter and silver beads.

Love a traditional Christmas palette? Stick with red petals and a gold center.

Want something more modern? Try champagne glitter, pearl-colored beads, or deep emerald accents.

You can even make a collection in different colors for a coordinated handmade display.

They’re Great for Handmade Gifts

A finished poinsettia ornament makes a thoughtful little gift for friends, neighbors, teachers, coworkers,

or family members.

Attach

a ribbon and place it in a small gift box or reusable presentation bag. It’s a lovely way to share something handmade without spending a fortune.

They’re a Fun Group Activity

This project can be enjoyable for a holiday crafting afternoon with friends or family. Adults can prepare the spoon pieces and handle the hot glue, while older children can help with glitter and decoration under close supervision.

The result is a collection of ornaments that can become part of your family’s holiday decorating tradition.

Materials You’ll Need

This project

uses 24 clear plastic spoons to create one layered poinsettia-style ornament.

Gather these supplies before you begin:

24 clear plastic spoons: Lightweight spoons with rounded bowls are easiest to arrange.

Hot glue gun: A low-temperature model may be more suitable for delicate plastic, although you should test it first.

Hot glue sticks: Keep a few extra nearby.

Red glitter: Fine glitter gives the petals a sparkling finish.

Gold beads or decorative pearls: These form the flower’s center.

Suitable craft adhesive: Useful if your chosen

beads aren’t compatible with hot glue.

Small scissors or craft snips: For trimming the spoon handles.

Ribbon or hanging cord: For making the ornament easy to display.

Small piece of sturdy cardboard or a craft base: To support the flower’s center.

Tweezers: Optional, but helpful for positioning small beads.

Paper or a shallow tray: To catch excess glitter and make cleanup easier.

You may also want a small brush for removing loose glitter once the adhesive has dried.

A Quick Safety Note Before You BeginA Quick Safety Note Before You

Begin

Plastic spoons vary in material

and heat resistance. Hot glue can soften or deform some plastics, and overheated plastic may release irritating fumes.

Use the lowest practical glue-gun temperature, work in a well-ventilated area, and test your technique on one spoon before continuing. Keep your fingers away from hot glue and allow every piece to cool fully before handling it.

If the spoon softens, bends unexpectedly, or gives off an unusual odor, stop using that method. A suitable cool-setting craft adhesive may be a better option.

Hot glue

guns should be operated by an adult or under close adult supervision. Keep the heated nozzle away from skin, and never leave a plugged-in glue gun unattended.

How to Make Red Glitter Plastic Spoon Poinsettias

Ready to turn those ordinary spoons into something festive? Let’s get crafting!

Step 1: Prepare Your Work Area

Cover your table with scrap paper, a protective mat, or another suitable surface.

Place the red glitter in a shallow tray or on a folded sheet of paper. This will catch the excess glitter and make it

easier to return unused material to its

container.

Set out the spoons, beads, ribbon, adhesive, and craft base so everything is within reach.

If you’re using a hot glue gun, place it on a stable, heat-resistant stand and keep the cord away from the working area.

A little preparation makes the whole project much easier.

Step 2: Separate the Spoon Bowls From the Handles

You’ll use the rounded bowls of the spoons to create the flower petals.

Carefully cut or snip off the handles, leaving the spoon bowls as

intact as possible. Depending on the spoon design,

you may need to trim away a small section of the handle attachment.

Work slowly to avoid cracking the plastic.

Smooth any sharp or jagged edges with appropriate craft tools, and discard the offcuts safely.

Tip: Test one spoon before preparing all 24. If the plastic cracks or splits when cut, choose a different type of spoon or use a safer cutting method.

Step 3: Test the Adhesive on One Spoon

Before decorating all the pieces, test how your chosen adhesive

behaves with the plastic.

If you’re using hot glue,

apply a very small amount to an inconspicuous area of one spoon bowl and let it cool.

Check whether the plastic warps and whether the glue holds securely.

If the spoon deforms, don’t continue with the same method. Switch to a compatible craft adhesive that doesn’t require heat.

This small test can save you from having to remake the entire ornament!

Step 4: Add the Red Glitter

Place a spoon bowl on your protected work surface.

Apply a thin, even

layer of suitable craft adhesive to the surface you want

to decorate. Sprinkle red glitter over the adhesive, making sure the bowl is covered evenly.

Gently tap off the excess glitter into your collection tray.

Repeat with the remaining spoon bowls.

Allow the adhesive to dry completely according to its product instructions before assembling the flower.

For a cleaner finish, work over a tray and avoid using more adhesive than necessary. Thick, uneven layers can leave clumps or make the petals look less polished.

If you prefer a subtler

look, glitter only the front of each petal. For extra sparkle,

you can decorate both sides, provided the adhesive is suitable for the plastic.

Step 5: Arrange the Petals Into Layers

Now comes the fun part!

Arrange the 24 decorated spoon bowls into overlapping layers to create a poinsettia-inspired flower.

Start with a small central cluster and position additional petals around it, gradually building outward into a fuller shape.

Rotate the bowls slightly as you arrange them so they resemble the radiating bracts of a poinsettia rather than a

simple row of spoons.

Take a moment to experiment with the arrangement

before attaching anything permanently.

You want the petals to look balanced, with enough overlap to hide the connections without covering too much of the glittered surface.

There isn’t just one correct arrangement. The exact pattern will depend on the size and shape of your spoon bowls and the base you use.

Step 6: Secure the Petals

Once you’re happy with the layout, attach the petals to a small, sturdy craft base or to one another where appropriate.

If you’re using hot glue, apply only a small amount at a time

and keep the glue away from areas where it might distort the plastic.

Hold each piece in position until the adhesive has set, following the product’s instructions.

Continue working outward, checking the shape as you go.

If the flower becomes uneven, pause and adjust the next petals rather than trying to force everything into place at the end.

Important: The flower should be lightweight enough for the finished ornament to hang securely. Avoid relying on a

single tiny glue joint to support the entire decoration.

Step 7: Add the Gold

ornament look messy.

Small, controlled applications are usually easier to manage than large blobs.

Plan the Petal Arrangement First

Arrange the pieces before gluing them together.

This gives you a chance to experiment with the shape and decide where each layer should sit.

Let Each Layer Set

Rushing the assembly can cause petals to shift before the adhesive has secured them.

Give each connection enough time to set before adding more weight or moving the

90 percent get this wrong  Check the first comment.

90 percent get this wrong Check the first comment.

by
90 percent get this wrong  Check the first comment.

Do You Really Need to Remove the Dark Line From Shrimp? Here’s Why It Matters

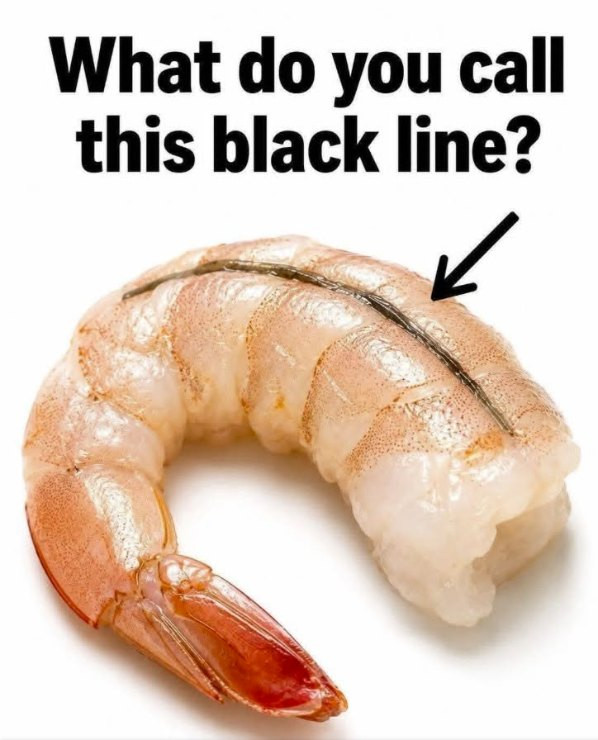
If you’ve ever prepared shrimp at home, you’ve probably noticed the dark line running along the back.

Some people remove it immediately. Others cook shrimp without giving it a second thought.

But what exactly is that dark line—and should you remove it?

What Is the “Vein”?

Despite commonly being called a vein, the dark line along the back of a shrimp is&

nbsp;

actually its digestive tract.

It can contain digested food as well as tiny amounts of sand or grit.

That doesn’t necessarily mean the shrimp is unsafe to eat if the line is left intact, but it can sometimes affect the eating experience.

Why Do People Remove It?

One of the biggest reasons is texture and taste.

Depending on the shrimp and what it has consumed, the digestive tract can sometimes contain gritty material or contribute an unpleasant, muddy or bitter taste.Removing it gives

the

shrimp a cleaner appearance and can make the final dish more enjoyable.

How to Devein Shrimp at Home

The process is easier than it looks.

Remove the shell, leaving the tail on or taking it off depending on your recipe.

Try CMS ToolsFind Recipes2. Make a shallow cut

Using a small, sharp knife, gently make a shallow cut along the back of the shrimp.

You should be able to see the digestive tract

running along

the back.

Lift it out

Use the tip of your knife or a small utensil to gently lift the line and pull it away.

Rinse if necessary

Quickly rinse the shrimp under cold running water if there is any remaining grit, then pat it dry.Is Deveining Always Necessary?

Not necessarily.

Whether you devein shrimp can depend on the size of the shrimp, how it was prepared, and your personal preference.

With very small shrimp, the digestive tract may be difficult

to notice and remove.

With

larger shrimp, however, the dark line is usually much more visible, making removal easier and more worthwhile.

Start Blogging

Identify Plants

Book a Safari

A Small Step That Can Make a Big Difference

Deveining doesn’t require special equipment or advanced cooking skills.

It takes only a few moments, but it can help give your shrimp a cleaner appearance and reduce the chance of encountering grit or an unpleasant flavor.

So the next time you’re preparing shrimp,

take a closer look at that little

dark line.

You may never look at your shrimp the same way again!

Doctors reveal that drinking coffee every morning causes…

Doctors reveal that drinking coffee every morning causes…

by
Doctors reveal that drinking coffee every morning causes…

Doctors reveal that drinking coffee every morning is… or isn’t!

Every morning, millions of people start their day with a steaming cup of coffee.

Its soothing aroma, its energy boost… coffee has become a common ritual. But how many cups do you have to consume for this habit to become harmful to your health?

Doctors are sounding the alarm and reminding us that coffee, consumed in moderation, can also be beneficial to our health.

Be careful not to overdo it!

Excessive caffeine consumption can have the opposite effect. According

to ANSES (the French Agency for Food, Environmental and Occupational Health & Safety), approximately 30% of adults and 11% of children in France consume more caffeine than the recommended dose, which can lead to:

Palpitations and anxiety

Anxiety and nervousness

Sleep disturbances

Long-term effects on the cardiovascular system and bones

Some people are more sensitive to caffeine, particularly pregnant women, children, and people taking heart medication or anti-anxiety drugs.

Some tips for drinking coffee safely

Choose filter coffee or hand-ground coffee, which is milder and less acidic.

Avoid drinking coffee

too late in the day, especially after 4 p.m.

Stay hydrated: alternate a cup of coffee with a glass of water.

Limit sugar and flavored syrups: they mask the natural benefits of coffee.

Listen to your body: if you feel nervous or experience palpitations, reduce your coffee consumption.

Coffee is not the enemy you think: consumed in moderation, it can be a real ally for your health. However, excessive caffeine consumption can lead to nervous fatigue, anxiety and sleep problems.

How much? Three to four cups per day

maximum, no more.

The secret, as always, is balance: drink coffee for pleasure and energy, not out of addiction

Would you like me to reword this text into a shorter, punchier, social media-friendly version (with emojis and catchy phrases)?

90 percent get this wrong  Check the first comment.

90 percent get this wrong Check the first comment.

by
90 percent get this wrong  Check the first comment.

Do You Really Need to Remove the Dark Line From Shrimp? Here’s Why It Matters

If you’ve ever prepared shrimp at home, you’ve probably noticed the dark line running along the back.

Some people remove it immediately. Others cook shrimp without giving it a second thought.

But what exactly is that dark line—and should you remove it?

What Is the “Vein”?

Despite commonly being called a vein, the dark line along the back of a shrimp is&

nbsp;

actually its digestive tract.

It can contain digested food as well as tiny amounts of sand or grit.

That doesn’t necessarily mean the shrimp is unsafe to eat if the line is left intact, but it can sometimes affect the eating experience.

Why Do People Remove It?

One of the biggest reasons is texture and taste.

Depending on the shrimp and what it has consumed, the digestive tract can sometimes contain gritty material or contribute an unpleasant, muddy or bitter taste.Removing it gives

the

shrimp a cleaner appearance and can make the final dish more enjoyable.

How to Devein Shrimp at Home

The process is easier than it looks.

Remove the shell, leaving the tail on or taking it off depending on your recipe.

Try CMS ToolsFind Recipes2. Make a shallow cut

Using a small, sharp knife, gently make a shallow cut along the back of the shrimp.

You should be able to see the digestive tract

running along

the back.

Lift it out

Use the tip of your knife or a small utensil to gently lift the line and pull it away.

Rinse if necessary

Quickly rinse the shrimp under cold running water if there is any remaining grit, then pat it dry.Is Deveining Always Necessary?

Not necessarily.

Whether you devein shrimp can depend on the size of the shrimp, how it was prepared, and your personal preference.

With very small shrimp, the digestive tract may be difficult

to notice and remove.

With

larger shrimp, however, the dark line is usually much more visible, making removal easier and more worthwhile.

Start Blogging

Identify Plants

Book a Safari

A Small Step That Can Make a Big Difference

Deveining doesn’t require special equipment or advanced cooking skills.

It takes only a few moments, but it can help give your shrimp a cleaner appearance and reduce the chance of encountering grit or an unpleasant flavor.

So the next time you’re preparing shrimp,

take a closer look at that little

dark line.

You may never look at your shrimp the same way again!

Mom Warns Others About The Link Between A ‘Fishy Smell’ And Melting Electrical Outlets.  Check the first comment.

Mom Warns Others About The Link Between A ‘Fishy Smell’ And Melting Electrical Outlets. Check the first comment.

by
Mom Warns Others About The Link Between A ‘Fishy Smell’ And Melting Electrical Outlets.  Check the first comment.

I would hope that we all know carbon monoxide is odorless, and that’s why everyone should have multiple carbon monoxide detectors in their home. Most people are also aware that a smell similar to rotten eggs signals a natural gas leak. But if you happened to smell something fishy in your home, what would your first reaction be? And by any chance, do electrical fires smell like fish?

Katie Rose Dugger took to Facebook to warn others about a fishy smell in her home that ended up being something pretty&

nbsp;

terrifying. Katie explained that a few weeks ago, her son’s bedroom started to smell like fish. She searched and deep cleaned his room, yet could still not figure out what the source of that awful smell was. Do electrical fires smell like fish? Finally, Katie decided to do a quick Google search in order to determine where the odor was coming from.

Her search revealed that a fishy odor can point to melting plastic from electrical outlets. Sure enough, she discovered an outlet that was overheating and melting the

plugs.

After calling an electrician that same day, the electrician found that there was a bad, loose wire in the outlet. He ended up having to replace the whole outlet. Do electrical fires smell like fish, you ask? Her experience answers that.

Let Katie’s warning serve as important information regarding the outlets in your home. If you smell something fishy and can’t figure out the source, it’s time to check the outlets and plugs for overheating. Do electrical fires smell like fish? Knowing this information could prevent a tragic

fire and

potentially even save lives.

Doctors reveal that drinking coffee every morning causes…

Doctors reveal that drinking coffee every morning causes…

by
Doctors reveal that drinking coffee every morning causes…

Doctors reveal that drinking coffee every morning is… or isn’t!

Every morning, millions of people start their day with a steaming cup of coffee.

Its soothing aroma, its energy boost… coffee has become a common ritual. But how many cups do you have to consume for this habit to become harmful to your health?

Doctors are sounding the alarm and reminding us that coffee, consumed in moderation, can also be beneficial to our health.

Be careful not to overdo it!

Excessive caffeine consumption can have the opposite effect. According

to ANSES (the French Agency for Food, Environmental and Occupational Health & Safety), approximately 30% of adults and 11% of children in France consume more caffeine than the recommended dose, which can lead to:

Palpitations and anxiety

Anxiety and nervousness

Sleep disturbances

Long-term effects on the cardiovascular system and bones

Some people are more sensitive to caffeine, particularly pregnant women, children, and people taking heart medication or anti-anxiety drugs.

Some tips for drinking coffee safely

Choose filter coffee or hand-ground coffee, which is milder and less acidic.

Avoid drinking coffee

too late in the day, especially after 4 p.m.

Stay hydrated: alternate a cup of coffee with a glass of water.

Limit sugar and flavored syrups: they mask the natural benefits of coffee.

Listen to your body: if you feel nervous or experience palpitations, reduce your coffee consumption.

Coffee is not the enemy you think: consumed in moderation, it can be a real ally for your health. However, excessive caffeine consumption can lead to nervous fatigue, anxiety and sleep problems.

How much? Three to four cups per day

maximum, no more.

The secret, as always, is balance: drink coffee for pleasure and energy, not out of addiction

Would you like me to reword this text into a shorter, punchier, social media-friendly version (with emojis and catchy phrases)?

Small shampoo bottles in hotels carry risks that few travelers are aware of.

Small shampoo bottles in hotels carry risks that few travelers are aware of.

by
Small shampoo bottles in hotels carry risks that few travelers are aware of.

Small bottles of shampoo, conditioner, and shower gel are a common sight in hotels. Many guests use them without a second thought, even packing them into their suitcases before leaving.

However, behind these products lies a little-known reality: while most are safe, there have been reports of bacterial contamination, lack of required approvals, and hygiene issues with reusable dispensers.

This doesn’t mean that all hotel cosmetics are unsafe, but it’s worth checking them before using them.

A case that caused concern

One of the most serious incidents occurred in the&

nbsp;

United States. Gilchrist & Soames, a supplier of hygiene products to numerous hotels, was forced to recall millions of units of shampoo, conditioner, body lotion, and shower gel.

An inspection by the US Food and Drug Administration (FDA) revealed significant microbiological contamination of some products.

Among the detected microorganisms was the bacterium *Pseudomonas aeruginosa* (Pseudomonas aeruginosa), which can cause infections, especially in people with a weakened immune system, open wounds

or co-occurring diseases.

The FDA also found deficiencies in manufacturing processes, cleaning procedures, raw material control, and contamination prevention.

The

company subsequently implemented corrective actions, and in 2018, the agency announced the completion of its review of these actions.

Official source: https://www.fda.gov/inspections-compliance-enforcement-and-criminal-investigations/warning-letters/gilchrist-soames-485833-02202018

This case shows that even products manufactured for well-known hotels can raise concerns if sanitary control procedures fail.

Products without the required permits were also detected.

The problem is not limited to one company.

Philippine health authorities issued a warning about a product called “Grand Regal Hotel Conditioning Shampoo” because it lacked the necessary approvals. Because the product had not

been registered,

During a subsequent inspection of tourist facilities in the country, authorities noted that more than half of the toiletries suppliers inspected were not properly registered.

This does not mean that all their products were contaminated, but it does indicate thatthey may have been produced or placed on the market without the required quality control.

Risks associated with refillable dispensers

To reduce plastic consumption, many hotels have replaced small, individual bottles with large dispensers

installed in the shower.

While this solution can be environmentally beneficial, the type

of system used is crucial.

Dispensers that use sealed, replaceable cartridges offer greater safety. However, dispensers that open to pour shampoo from a large container can become contaminated if not properly cleaned and disinfected before refilling.

Scientific studies of refillable dispensers have shown that bacteria can grow and form biofilms inside these systems. Previous studies cited by the researchers found contaminants in approximately one in four dispensers tested.

Topping up occurs when new product is added without first emptying, washing, disinfecting, and drying the container.Bacteria present in product residues

may adhere to the inner walls and contaminate the newly poured contents.

There’s also a risk of tampering with the dispenser by guests if it’s easy to open. Stories circulate online about people allegedly pouring depilatory cream or other substances into these containers.

While there is no evidence that this is common practice, an open or unsecured dispenser is an avoidable risk.

How can you tell

if hotel shampoo may be dangerous?

Before use, it is worth paying attention to a few details.

Do not use the product if

the bottle:

It has a broken seal or appears to have been previously opened.

Shows signs of leakage around the cap. Contains fluid that has separated, is lumpy, or has an unusual color.

It emits an unusual smell.

It is completely devoid of any label or markings.

Looks like it has been refilled or used.

It has expired or comes from an unknown source.

In the case

of large dispensers, it is worth making sure that they are securely fastened and closed and that they are notshow signs of

tampering. If the lid can be easily lifted or the contents look unusual, it is best not to use it.

Squeeze Hot Glue Into 24 Dollar Store Plastic Spoons, and the End Result Is Magical!

Squeeze Hot Glue Into 24 Dollar Store Plastic Spoons, and the End Result Is Magical!

by
Squeeze Hot Glue Into 24 Dollar Store Plastic Spoons, and the End Result Is Magical!

What if I told you that a handful of inexpensive plastic spoons could become one of the prettiest decorations on your Christmas tree? It sounds a little unusual, I know! But with sparkling red glitter, a few gold beads, and a little creativity, ordinary plastic spoons can be transformed into beautiful poinsettia-inspired ornaments that look surprisingly elegant.

This DIY red glitter poinsettia ornament is proof that holiday decorating doesn’t have to be expensive to look beautiful.

Imagine layered red petals catching the twinkle of Christmas lights, a shimmering gold&

nbsp;

center, and a delicate ribbon that lets your handmade flower hang proudly on the tree. You could also use these sparkling creations to decorate a wreath, dress up a wrapped present, or add a festive touch to a holiday centerpiece.

And the best part? You don’t need to be an experienced crafter to make something lovely!

If you enjoy finding clever ways to decorate on a budget, this project is a wonderful excuse to gather your supplies, put on some Christmas music, and spend a cozy afternoon making something

special.

Let’s turn those simple dollar-store spoons into a little holiday magic!

What Are DIY Plastic Spoon Poinsettia Ornaments?

Poinsettias are closely associated with Christmas because of their colorful, star-shaped bracts, which are often mistaken for flower petals. Their rich red and green appearance has made them a favorite in holiday decorating for generations.

This craft takes inspiration from that familiar shape and recreates it using the rounded bowls of clear plastic spoons.

The spoon bowls become individual petals. Once arranged in overlapping layers, they form a full flower shape.

Red

glitter adds sparkle, while gold beads clustered in the middle create a decorative center.

A ribbon loop completes the ornament, making it easy to hang wherever you want a little extra holiday cheer.

Although these handmade flowers aren’t real poinsettias, they capture the festive colors and layered appearance that make the traditional Christmas flower so recognizable.

You can keep yours classic with red and gold, or experiment with white, silver, emerald green, champagne, or even icy blue.

One simple idea, so many possibilities!

Why You’ll Love This Christmas

Craft

There

are plenty of reasons to give these DIY poinsettia ornaments a try.

They’re Budget-Friendly

Plastic spoons, glitter, beads, and ribbon are usually inexpensive supplies. If you already have a glue gun and some craft materials at home, you may only need to purchase a few extras.

You can create several decorations without investing in costly specialty ornaments.

They Look Beautiful on a Christmas Tree

The layered petals give the ornament depth, while the glitter reflects the light from nearby Christmas lights.

Red and gold make a particularly

festive combination, especially

when paired with traditional green branches, gold ribbon, and warm white lights.

They’re Easy to Customize

Prefer a snowy winter theme? Use white glitter and silver beads.

Love a traditional Christmas palette? Stick with red petals and a gold center.

Want something more modern? Try champagne glitter, pearl-colored beads, or deep emerald accents.

You can even make a collection in different colors for a coordinated handmade display.

They’re Great for Handmade Gifts

A finished poinsettia ornament makes a thoughtful little gift for friends, neighbors, teachers, coworkers,

or family members.

Attach

a ribbon and place it in a small gift box or reusable presentation bag. It’s a lovely way to share something handmade without spending a fortune.

They’re a Fun Group Activity

This project can be enjoyable for a holiday crafting afternoon with friends or family. Adults can prepare the spoon pieces and handle the hot glue, while older children can help with glitter and decoration under close supervision.

The result is a collection of ornaments that can become part of your family’s holiday decorating tradition.

Materials You’ll Need

This project

uses 24 clear plastic spoons to create one layered poinsettia-style ornament.

Gather these supplies before you begin:

24 clear plastic spoons: Lightweight spoons with rounded bowls are easiest to arrange.

Hot glue gun: A low-temperature model may be more suitable for delicate plastic, although you should test it first.

Hot glue sticks: Keep a few extra nearby.

Red glitter: Fine glitter gives the petals a sparkling finish.

Gold beads or decorative pearls: These form the flower’s center.

Suitable craft adhesive: Useful if your chosen

beads aren’t compatible with hot glue.

Small scissors or craft snips: For trimming the spoon handles.

Ribbon or hanging cord: For making the ornament easy to display.

Small piece of sturdy cardboard or a craft base: To support the flower’s center.

Tweezers: Optional, but helpful for positioning small beads.

Paper or a shallow tray: To catch excess glitter and make cleanup easier.

You may also want a small brush for removing loose glitter once the adhesive has dried.

A Quick Safety Note Before You BeginA Quick Safety Note Before You

Begin

Plastic spoons vary in material

and heat resistance. Hot glue can soften or deform some plastics, and overheated plastic may release irritating fumes.

Use the lowest practical glue-gun temperature, work in a well-ventilated area, and test your technique on one spoon before continuing. Keep your fingers away from hot glue and allow every piece to cool fully before handling it.

If the spoon softens, bends unexpectedly, or gives off an unusual odor, stop using that method. A suitable cool-setting craft adhesive may be a better option.

Hot glue

guns should be operated by an adult or under close adult supervision. Keep the heated nozzle away from skin, and never leave a plugged-in glue gun unattended.

How to Make Red Glitter Plastic Spoon Poinsettias

Ready to turn those ordinary spoons into something festive? Let’s get crafting!

Step 1: Prepare Your Work Area

Cover your table with scrap paper, a protective mat, or another suitable surface.

Place the red glitter in a shallow tray or on a folded sheet of paper. This will catch the excess glitter and make it

easier to return unused material to its

container.

Set out the spoons, beads, ribbon, adhesive, and craft base so everything is within reach.

If you’re using a hot glue gun, place it on a stable, heat-resistant stand and keep the cord away from the working area.

A little preparation makes the whole project much easier.

Step 2: Separate the Spoon Bowls From the Handles

You’ll use the rounded bowls of the spoons to create the flower petals.

Carefully cut or snip off the handles, leaving the spoon bowls as

intact as possible. Depending on the spoon design,

you may need to trim away a small section of the handle attachment.

Work slowly to avoid cracking the plastic.

Smooth any sharp or jagged edges with appropriate craft tools, and discard the offcuts safely.

Tip: Test one spoon before preparing all 24. If the plastic cracks or splits when cut, choose a different type of spoon or use a safer cutting method.

Step 3: Test the Adhesive on One Spoon

Before decorating all the pieces, test how your chosen adhesive

behaves with the plastic.

If you’re using hot glue,

apply a very small amount to an inconspicuous area of one spoon bowl and let it cool.

Check whether the plastic warps and whether the glue holds securely.

If the spoon deforms, don’t continue with the same method. Switch to a compatible craft adhesive that doesn’t require heat.

This small test can save you from having to remake the entire ornament!

Step 4: Add the Red Glitter

Place a spoon bowl on your protected work surface.

Apply a thin, even

layer of suitable craft adhesive to the surface you want

to decorate. Sprinkle red glitter over the adhesive, making sure the bowl is covered evenly.

Gently tap off the excess glitter into your collection tray.

Repeat with the remaining spoon bowls.

Allow the adhesive to dry completely according to its product instructions before assembling the flower.

For a cleaner finish, work over a tray and avoid using more adhesive than necessary. Thick, uneven layers can leave clumps or make the petals look less polished.

If you prefer a subtler

look, glitter only the front of each petal. For extra sparkle,

you can decorate both sides, provided the adhesive is suitable for the plastic.

Step 5: Arrange the Petals Into Layers

Now comes the fun part!

Arrange the 24 decorated spoon bowls into overlapping layers to create a poinsettia-inspired flower.

Start with a small central cluster and position additional petals around it, gradually building outward into a fuller shape.

Rotate the bowls slightly as you arrange them so they resemble the radiating bracts of a poinsettia rather than a

simple row of spoons.

Take a moment to experiment with the arrangement

before attaching anything permanently.

You want the petals to look balanced, with enough overlap to hide the connections without covering too much of the glittered surface.

There isn’t just one correct arrangement. The exact pattern will depend on the size and shape of your spoon bowls and the base you use.

Step 6: Secure the Petals

Once you’re happy with the layout, attach the petals to a small, sturdy craft base or to one another where appropriate.

If you’re using hot glue, apply only a small amount at a time

and keep the glue away from areas where it might distort the plastic.

Hold each piece in position until the adhesive has set, following the product’s instructions.

Continue working outward, checking the shape as you go.

If the flower becomes uneven, pause and adjust the next petals rather than trying to force everything into place at the end.

Important: The flower should be lightweight enough for the finished ornament to hang securely. Avoid relying on a

single tiny glue joint to support the entire decoration.

Step 7: Add the Gold

ornament look messy.

Small, controlled applications are usually easier to manage than large blobs.

Plan the Petal Arrangement First

Arrange the pieces before gluing them together.

This gives you a chance to experiment with the shape and decide where each layer should sit.

Let Each Layer Set

Rushing the assembly can cause petals to shift before the adhesive has secured them.

Give each connection enough time to set before adding more weight or moving the
If you have a heart attack at home, do this in 10 seconds and you can save your life.(1 / 2)

If you have a heart attack at home, do this in 10 seconds and you can save your life.(1 / 2)

by
If you have a heart attack at home, do this in 10 seconds and you can save your life.(1 / 2)

Silence at home, sometimes, isn’t just a lack of noise. It’s an invisible wall that rises when the body sends out alarm signals that can’t be ignored. It’s the moment when everyday life falls apart, giving way to a sense of oppression that suddenly tightens the chest like a vice, leaving no escape. You feel a growing pressure, an discomfort that seems to rise from tired muscles to become a vital emergency.

It’s the clear and terrifying realization of being completely alone in an environment that until a few

moments

ago seemed reassuring. The room begins to feel too small. There’s no one to ask for help, no hand to hold for comfort in this critical moment. Breathing becomes shallow, labored, as the heart struggles to maintain a rhythm that is no longer its own.

Every passing second brings with it a question that weighs more than a boulder. What is left to do when the world around you shrinks to a few square meters? Instinct tells you to move, to look for a way out, but the

mind races

frantically for an immediate solution. It’s the search for a last-ditch effort, a desperate attempt to force the body to react before time runs out.

An action that may seem absurd, almost out of place in such a dramatic context, but it is passed down as a potential lifesaver. A maneuver that promises to gain that extra breath, that life-saving heartbeat needed to keep circulation going. But is this desperate attempt truly effective? The answer is a race against time.

It’s a search for a precarious balance

between paralyzing panic

and the clarity that must guide every move. The line between the normality of an ordinary day and the abyss is thin, almost imperceptible. And right now, in this exact moment, we must decide how to act to reverse the final twist. All the details are on the of our article.

When you suspect a heart attack, the first thing to do is call for help immediately. However, if a person is alone and suddenly experiences symptoms, it can be helpful to know some

steps that could help

in the very first moments.

An often-cited technique involves coughing forcefully and repeatedly, alternating each cough with a deep breath. The idea behind this is that coughing temporarily compresses the chest, which can help maintain blood circulation for a few moments.

This chest movement can help stimulate the heart and promote blood flow while you try to reach the phone or call emergency services. During a heart attack, the heart can struggle to pump blood effectively. Every second counts. Coughing forcefully, accompanied by deep breaths,

may temporarily help maintain circulation.

Of course, this is no substitute for medical treatment, but it can be an attempt to buy time until help arrives.

It’s essential to know how to read the signals your body sends before the situation escalates. A feeling of tightness in the chest, or intense pain radiating to the back, arm, or jaw, are indicators that should never be ignored. Often associated with cold sweats, dizziness, or nausea, these symptoms require immediate action.

Cardiovascular prevention is confirmed by the scientific community as the

most effective defense against such events.

Constantly monitoring vital signs such as blood pressure and cholesterol levels is the first step to protecting heart health. A balanced diet, combined with regular physical activity and the avoidance of harmful habits such as smoking, drastically reduces the risk of finding yourself in such a serious situation.

In conclusion, while knowledge of first aid techniques can offer temporary support, the real key remains the speed with which you alert 911 or local emergency services. Not relying solely on self-help methods, but seeking

professional support promptly, is the only actionthat can truly make the difference between a serious complication and the possibility of saving your life.